This is the first post on Numeric Citizen I/O about my blogger workflow. This website’s mission is metablogging, which means writing about the tools and services that I use as a blogger and content creator. I hope you enjoy the ride here. This is the most comprehensive update yet. In this workflow release, as of 2021-03, there are many important changes. Here is a run-down, in no particular order.
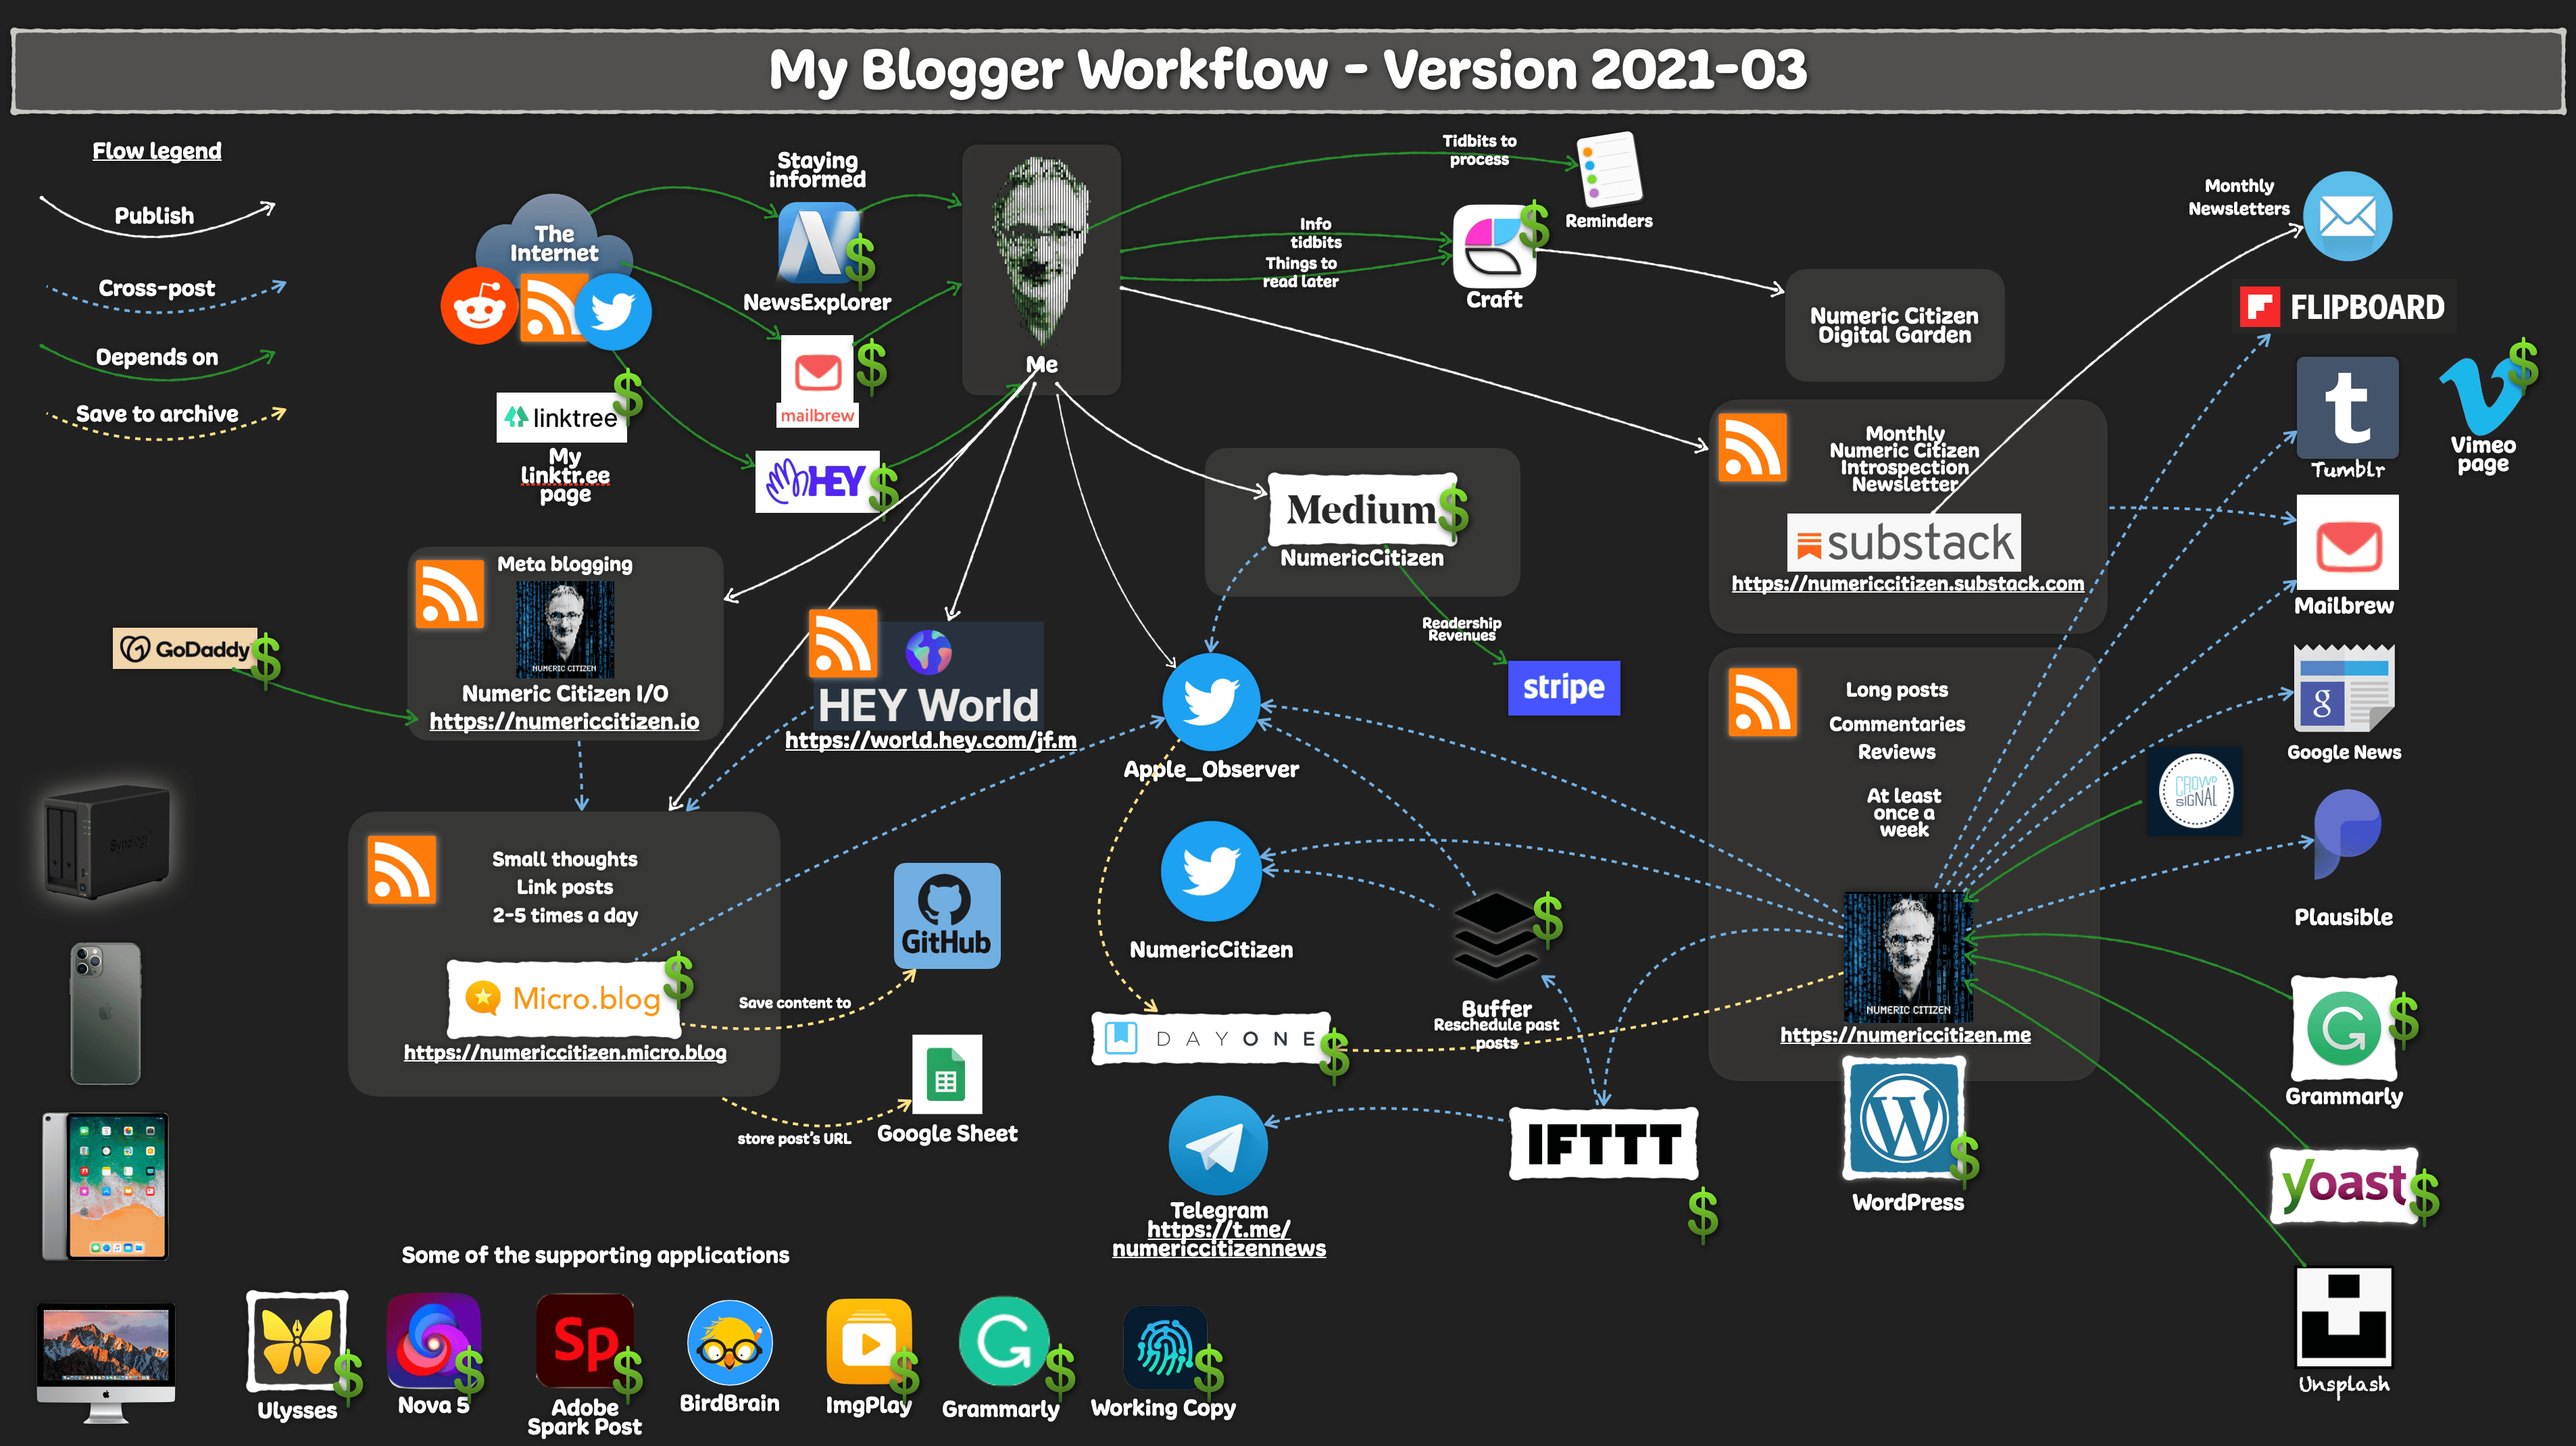 My blogger workflow as of 2021-03.
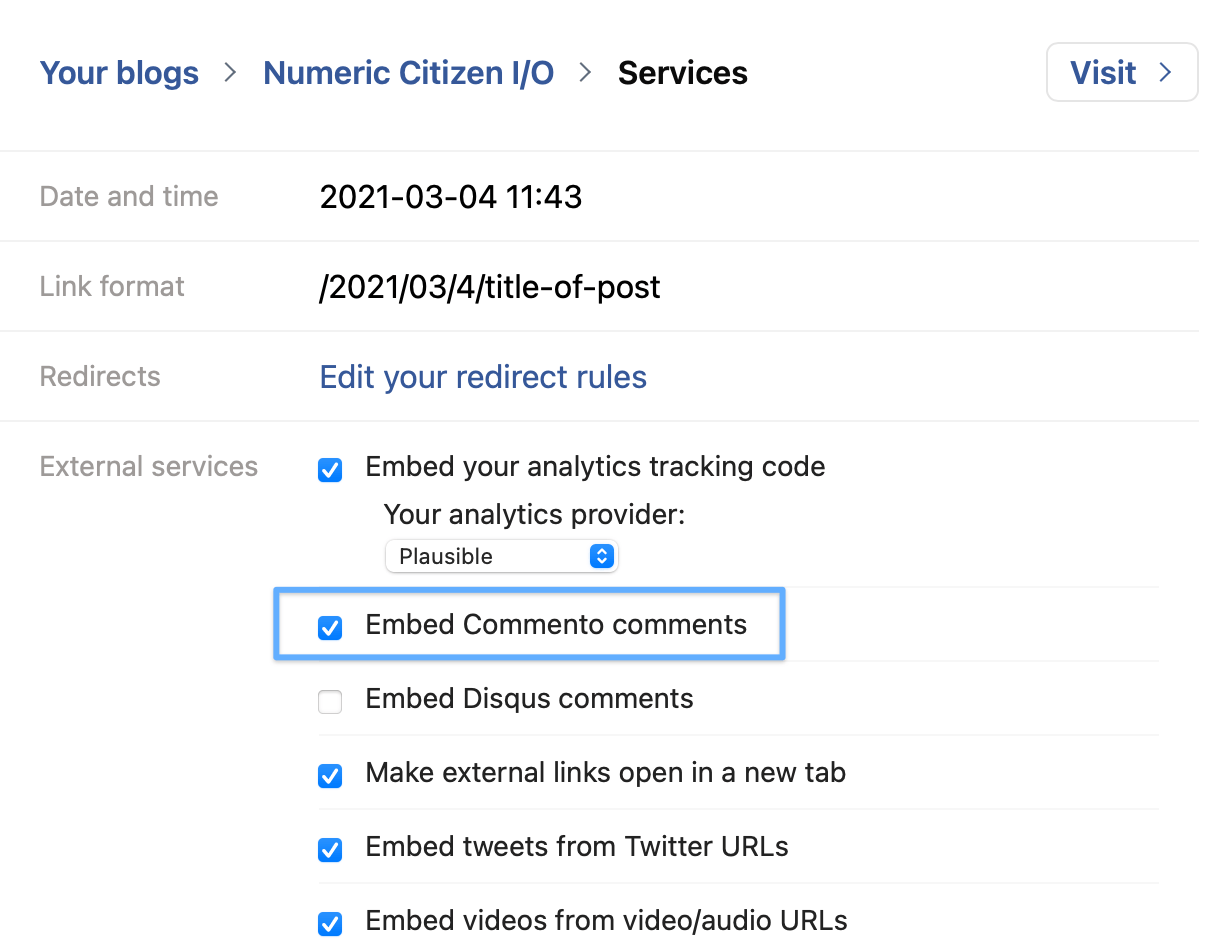
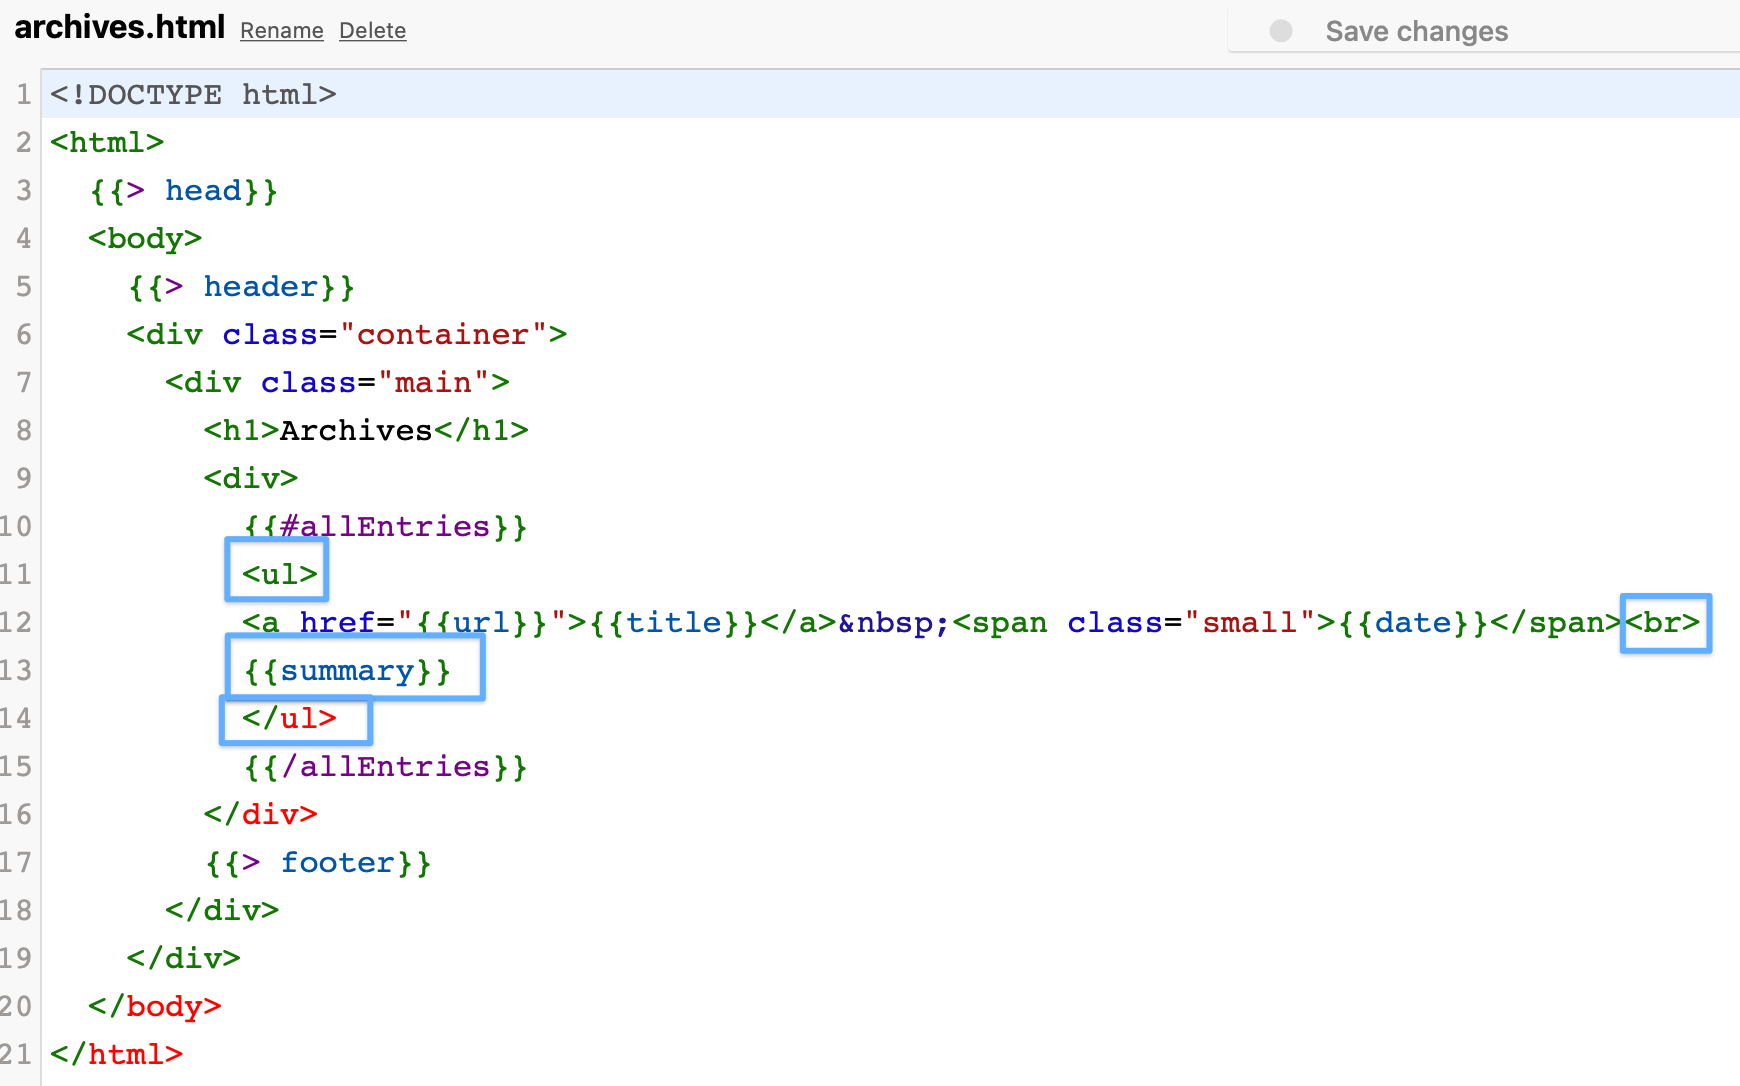
- First, as stated earlier, I created a new website about meta-blogging. It’s called Numeric Citizen I/O, which is hosted on Blot. That’s where I’m talking about the tools and experience as a blogger and content creator. The domain name is hosted on GoDaddy. Domains ending with .io aren’t cheap, here are possible reasons why. I’m super happy with Blot. Their support is excellent. I learned how to properly use Git in my endeavour. I’m using Commento as a commenting service which is privacy friendly.
- Linktr.ee: is now my virtual visitor card. Super easy to set up. Lots of formatting options. Not cheap, though. In the past, I had an account on about.me which I closed because of its lack of formatting features. I’m pleased with Linktr.ee.
- Gone is the venerable MarsEdit on my Mac. Ulysses version 22 supports publishing to Micro.blog. I do like MarsEdit, but I prefer Ulysses which is available on all Apple platforms.
- Gone is Linky, from my iOS devices. Used to be a great app for sharing links on Twitter and text highlighting. As my Twitter usage has dramatically reduced in recent months, I no longer need it. The app is no longer being updated, apparently, which is also contributing to its demise.
- Now in: Nova and Working Copy for publishing to Blot. Nova was recently reviewed on MacStories.net. I think it is important to show support for those developers who care to create real Mac software, not just ports of Windows apps.
- Now enabled is the automatic archive of my Micro.blog content to a Github repo. I like the idea of having my content available on Github. Using Nova, I cloned the repo on my Mac too. From time to time, I make pull requests to update my local repo.
- Craft is my new note-taking application, replacing Notion. Read my recent article on Craft. I still have content on Notion and I don’t know ye how and when I’ll be able to take it out. I’m waiting for their APIs release. I’m in no rush.
- Speaking of Craft, I’m using it to maintain a digital garden which can be found here. It’s super easy to nurture and the extensive formatting options of Craft allows me to have a decent website. You can leave comments by the way!
- Apple’s shortcuts, not shown here, play a small part in my workflow. One of them is to generate quotes from a web page by selecting the text that I want to quote. Another one is to create a page in Craft from a website. It’s very handy and covers a use case not available in Craft but which is available in Notion.
- I restarted my Vimeo page as an experiment and for storing short clips of user-interface micro-interactions from apps that I use and like a lot. You’ll find many examples from Craft. Vimeo is not cheap. Microinteractions are created using the screen recording feature of iOS, but are converted to GIF when needed in a blog post using IMGplay, an excellent GIF maker available on all Apple platforms.
- I’m still super happy with Plausible, a Google Analytics replacement. You can have a look at my visitor statistics for this site, for example.
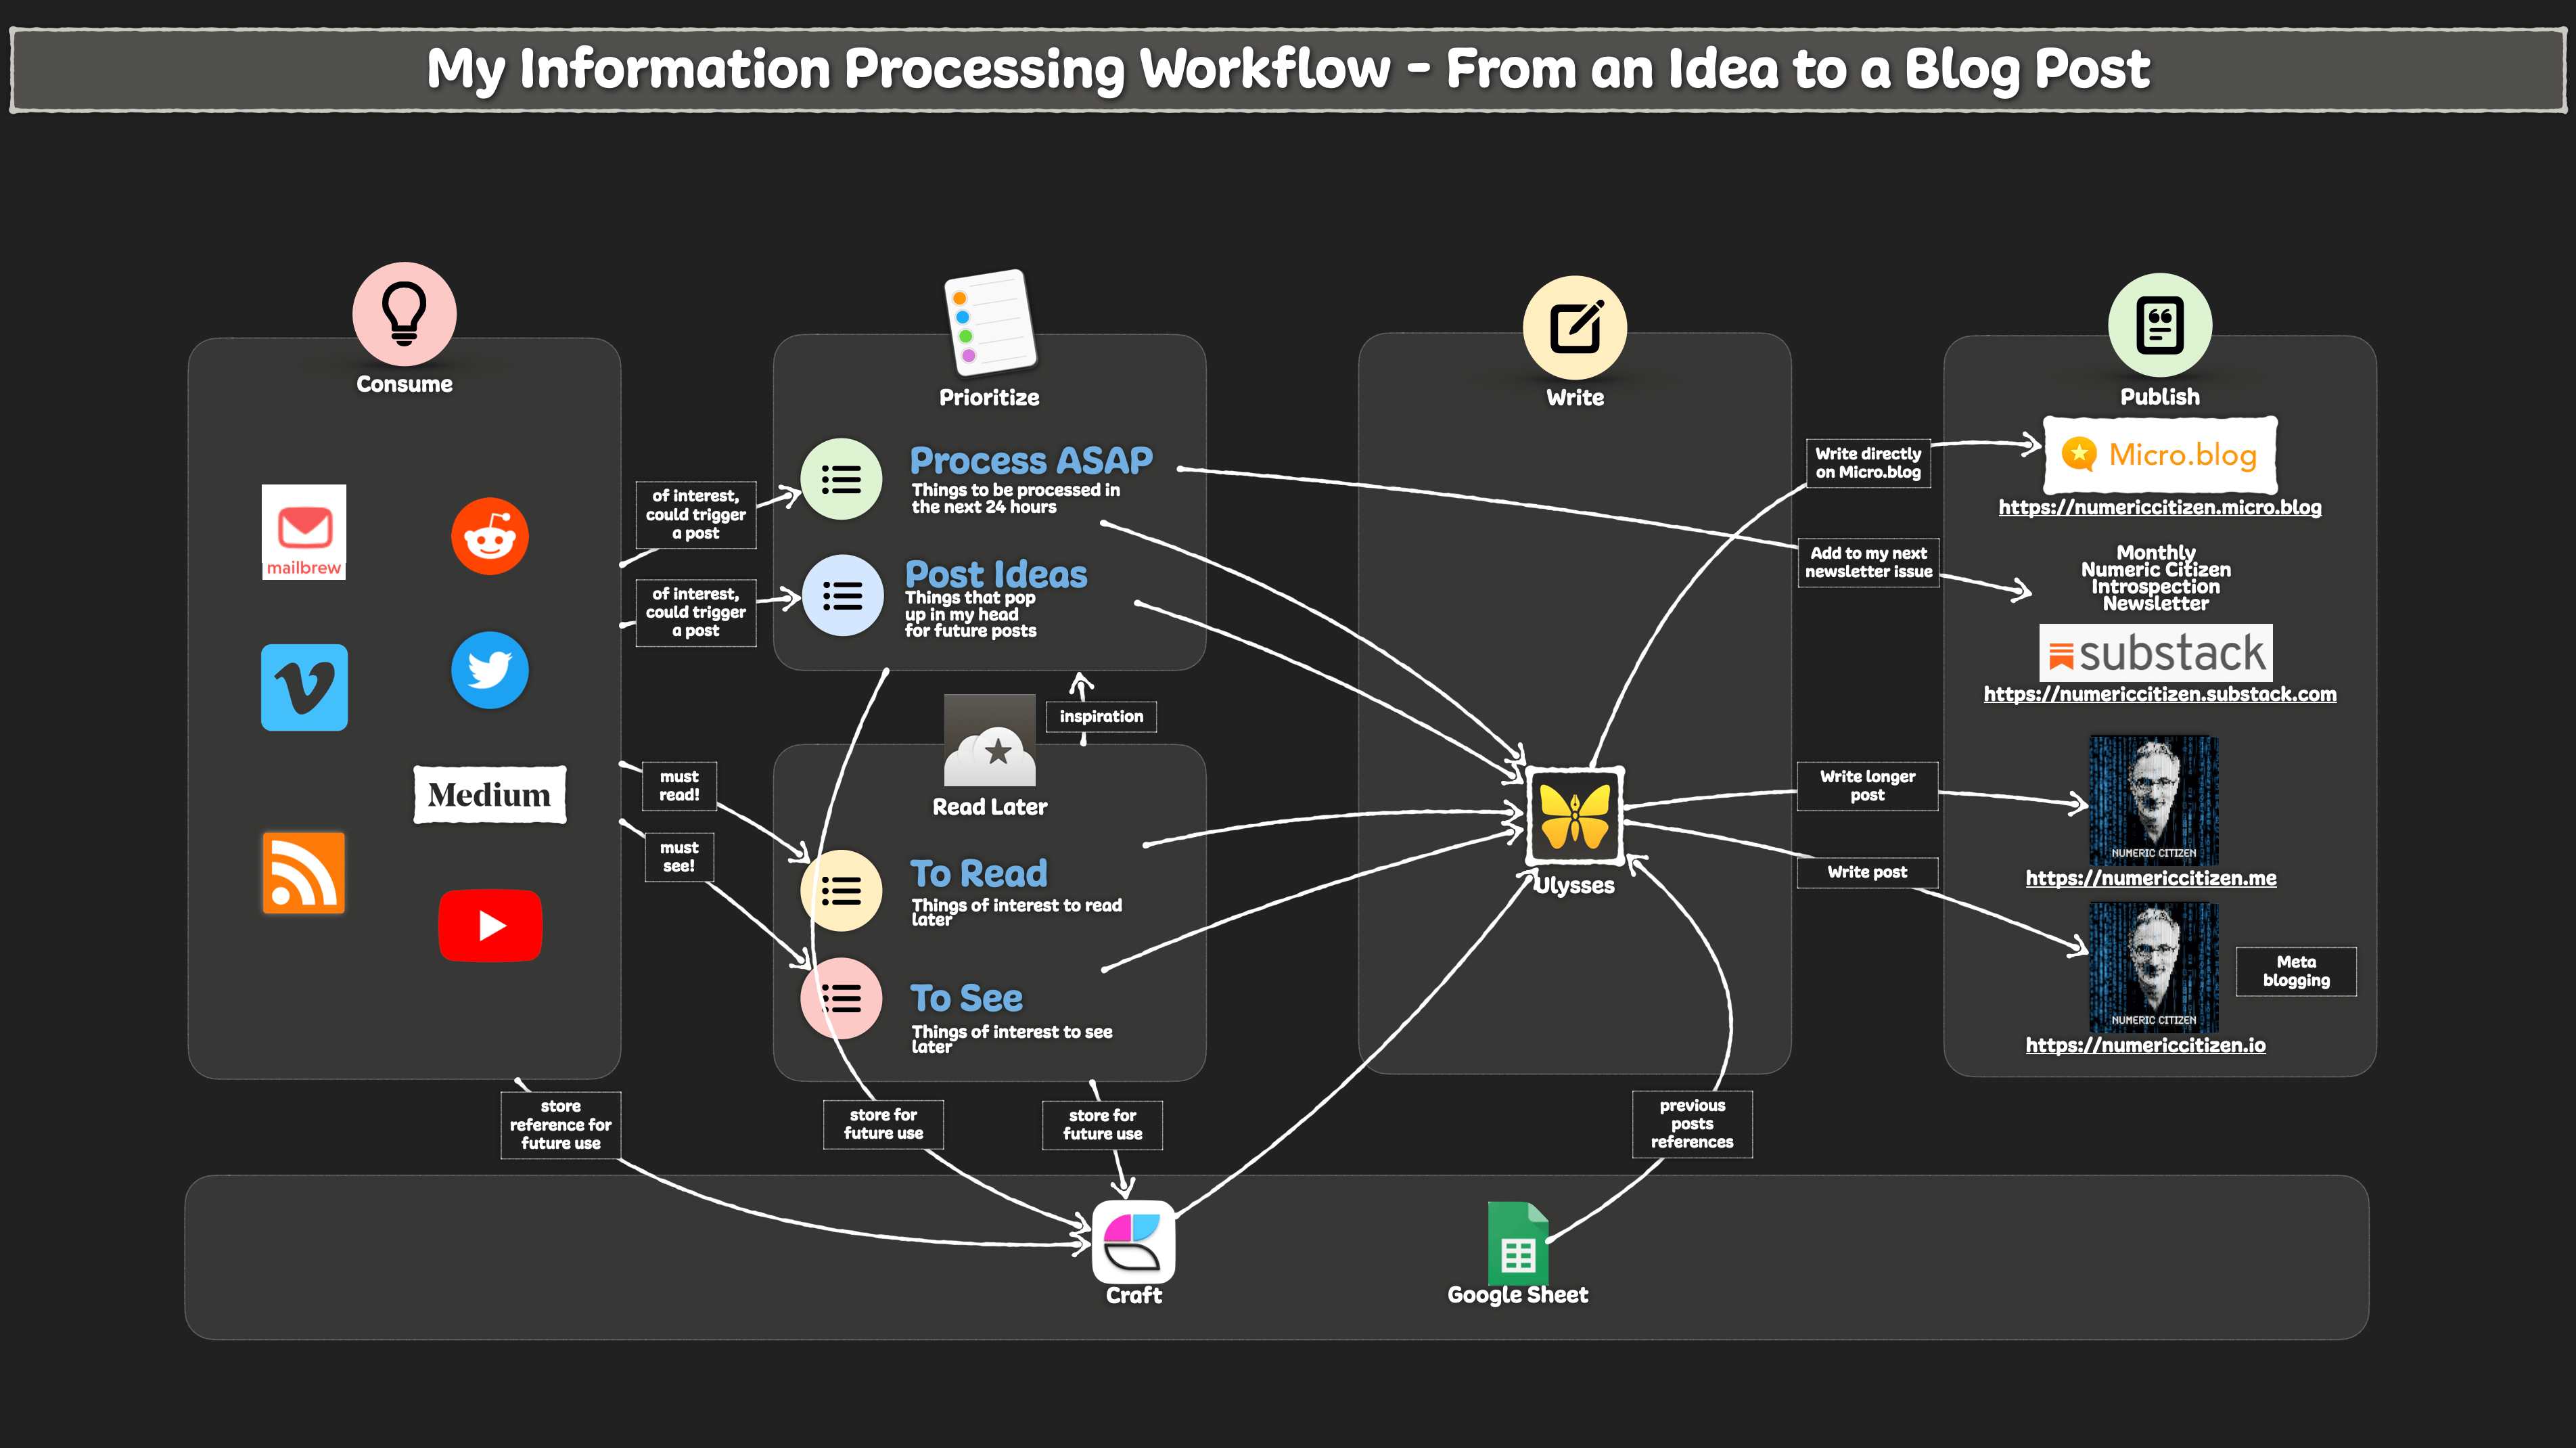 From an idea to a blog post.
Under consideration
Reeder for maintaining a list of read later articles. I could use Craft for this instead. I created a page that contains all the bookmarks. This page is accessible from my digital garden, too. I like Reeder’s design for reading, though. Maybe there is a more profound problem: read later features like the one with Safari or with an app like Reeder don’t make me read more. I tend to forget about things I save in these lists. So, why give a damn about those app and service? If I don’t read an article that I find interesting in the first few hours or days, I’ll never read it. I’ll give myself some more time to think about this one.
Readwise: It is a fascinating service, but as my Twitter usage has dropped significantly, its usefulness is uncertain. Syncing highlights from Medium is interesting, though, because I’m a big reader of Medium content. The iPad app is lacking in certain areas. There is no Safari Extension that I’m aware of. Let’s see where it all goes from here.
A return of Things. Craft is able to export and import data to and from Things but not from Apple’s Reminder. The problem is that Things doesn’t have an URL field, which I depend on in Apple’s Reminder. I asked the Craft developers if support for Reminders was coming. It is coming. Things won’t make it back, I think.
Using Square on Linktr.ee to enable tips from my readers. Too bad only Square is supported, I would have preferred Stripes on which I already have an account setup to receive Medium payments. Furthermore, my experience shows that people don’t tip bloggers. Nobody really cares to support marginal content creator like me. Oh well, getting my rewards from the journey, instead.
Moving my Photo Legend Series to HEY World. I think it would be interesting to restart this photo series but this time on HEY World. It is super easy to publish, much easier than WordPress. That’s enough to consider this move.
That’s it for this blogger workflow update. Things are starting to settle a bit. I don’t see major changes in the foreseeable future. I hope you made some discoveries with this blog post. Let me know in the comment section.